



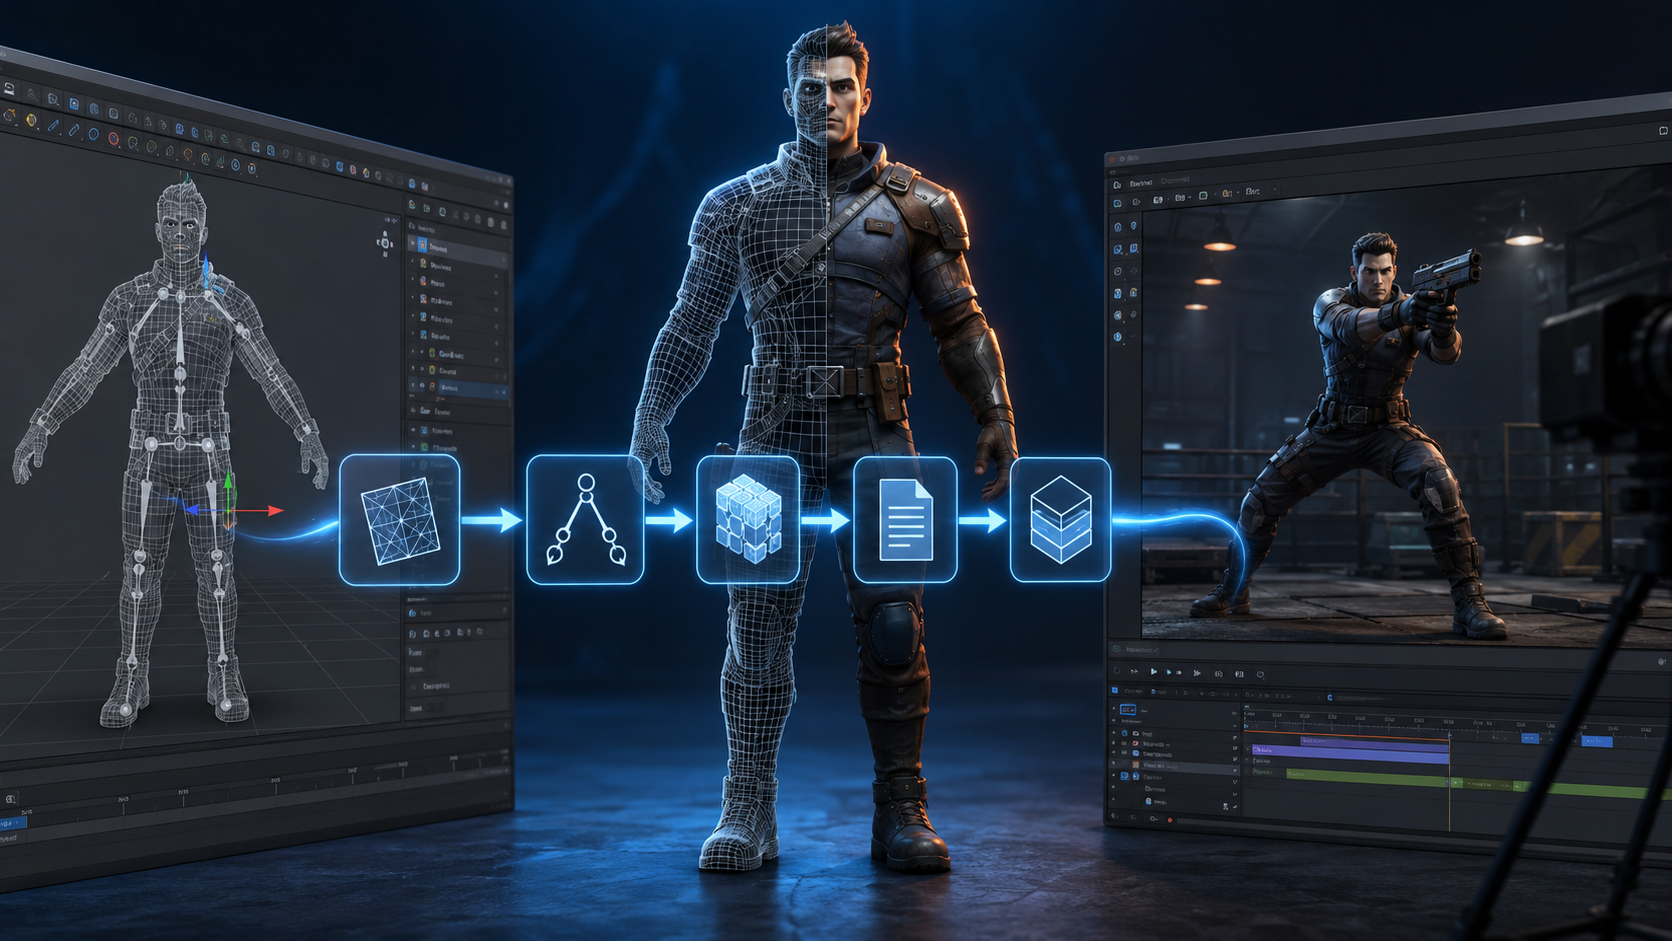
A model can look perfect in Blender and still be completely unusable in Source Filmmaker. That is because SFM cannot load a Blend, FBX, or OBJ file as a finished model. The asset must first pass through the Source Engine model pipeline.
If you want to learn how to compile a model for SFM, the basic process is straightforward: prepare the mesh, export the Source files, create the materials, write a QC file, compile everything with StudioMDL, and test the result. The details can feel confusing at first, but each file has a clear job once you understand the workflow.
This guide focuses on the original Source Filmmaker, not Source 2 Filmmaker. It uses Blender and Crowbar because they provide one of the most accessible routes for beginners, although the same general process applies to models prepared in other 3D programs.
What Happens When an SFM Model Is Compiled?
Compiling turns editable source data into the binary files that Source Filmmaker can read. In a typical Blender-to-SFM workflow, the model moves through these stages:
Blender model → SMD or DMX export → QC instructions → StudioMDL → compiled model files
The exported SMD or DMX files carry information such as geometry, bones, weights, and animation. A QC file tells the compiler how those pieces fit together. StudioMDL then builds the MDL and its supporting files.
Crowbar does not replace StudioMDL. It gives you a more convenient interface for selecting a QC file, choosing the correct game setup, running the compiler, and reading the log. Valve’s model-compilation documentation describes the same source files, QC instructions, and compiler stages, while Crowbar packages the process in a friendlier window.
Textures follow a separate path. They are not normally packed inside the MDL. SFM looks for VMT material files and VTF texture files in the materials directory. This separation is why a model may compile successfully but still appear with purple-and-black squares.
Tools You Need Before Starting
Blender or Another 3D Modeling Program
Blender is a practical choice because it handles modeling, UV mapping, rigging, weight painting, and animation in one free program. Maya and 3ds Max can also be used, but this guide follows a Blender-based process.
You do not need to build every model from scratch. The same workflow can be used to prepare a model you have permission to port or modify. In either case, the mesh must be cleaned and adapted for the Source Filmmaker model format before compilation.
Blender Source Tools
Standard Blender exports are not enough for the classic Source pipeline. Blender Source Tools adds SMD and DMX import and export support. Install a release that works with your Blender version, enable the add-on, and check that the Source Engine export panel appears before preparing a large project.
Crowbar
Crowbar is widely used to compile SFM models, decompile existing Source models, view model files, and manage game configurations. For a beginner, its biggest advantage is that it displays the StudioMDL output in a readable compile log.
Download Crowbar from its official Steam group or linked release page. Keeping it in a simple folder is fine; the important part is configuring the correct SFM paths inside the program.
StudioMDL and Source Filmmaker Files
StudioMDL is Valve’s actual Source model compiler. A normal Source Filmmaker installation includes the compiler and the game files it needs. Crowbar must point to the SFM compiler rather than a StudioMDL version from another Source game.
You should also verify the location of SFM’s gameinfo file. This tells the tools which game configuration and content folders to use during compilation.
Texture and Model-Testing Tools
You need a texture tool that can create or convert images to VTF format. You will also need a text editor for VMT and QC files, although neither file requires programming knowledge.
Half-Life Model Viewer, often shortened to HLMV, is useful for checking a compiled model before opening a full SFM session. It can reveal incorrect scale, missing materials, broken bones, bad sequences, and other problems quickly.
Files Used in the SFM Model Pipeline
| File type | Purpose |
|---|---|
| Blend, FBX, or OBJ | Editable or exchange file used while preparing the model |
| SMD | Source file for meshes, skeletons, collision models, or animations |
| DMX | A richer Source data format often used for models, skeletal data, and flex-related work |
| VTA | Vertex-animation data used in some facial or flex workflows |
| QC | Text instructions that tell StudioMDL what to compile |
| VTF | Texture image in Valve Texture Format |
| VMT | Material definition that tells Source how to display a texture |
| MDL | Main compiled model file |
| VVD | Compiled vertex data |
| VTX | Compiled mesh data for a supported rendering path |
| PHY | Optional collision or physics data |
| ANI | Separate animation data produced by some models |
An SFM compiled model is usually a group of related files, not one MDL by itself. If you move or share the model, keep the MDL, VVD, VTX variants, and any generated PHY or ANI files together.
Step 1: Decide What Kind of SFM Model You Are Making
Before exporting anything, decide whether the asset is a static object or a rigged model. That choice affects the Blender setup, QC instructions, collision method, and testing process.
Static Prop
A static prop is the easiest first project. Think of a chair, mug, sign, or simple piece of scenery. It usually needs clean geometry, UVs, at least one material, and a basic sequence for compilation. A simplified collision mesh is optional if you need physical interaction.
Starting with a single-material prop helps you learn the SFM model compilation process without dealing with facial controls, complex skeletons, or dozens of animations.
Rigged Character or Ragdoll
A character needs a skeleton, sensible bone names, clean vertex weights, and a valid rest pose. Depending on the intended use, it may also need animation sequences, bodygroups, skins, facial flexes, jigglebones, and a physics setup.
Do not add every advanced feature during the first compile. Get the basic reference mesh, skeleton, material, and idle sequence working first. Once that version loads correctly, add the more complicated features one at a time.
Step 2: Prepare the Model in Blender
Good compilation begins with a clean source model. A compiler can report technical problems, but it cannot repair poor topology, broken UVs, or careless rigging.
Remove unused objects, hidden duplicate meshes, loose geometry, duplicate vertices, and material slots you no longer need. Inspect the face normals and correct any surfaces pointing the wrong way. Check the UV layout to make sure the texture is mapped as expected.
Next, review the model’s origin, scale, and orientation. SFM model scale often causes trouble because an object that looks normal in Blender may appear tiny or enormous in Source Filmmaker. Use a known Source model as a size reference when possible, and verify the scale in HLMV after the first compile.
Transforms also matter. Make sure the exported result has the intended location, rotation, and scale. With a rigged model, confirm that any transform changes do not disturb the armature or rest pose before exporting.
For a character, inspect the entire bone hierarchy and weight painting. Look for vertices that are not assigned to a bone, weights that create harsh deformation, and unnecessary influences. If StudioMDL reports too many bone weights or another engine limit, reduce and normalize the weights instead of ignoring the message.
Keep the material setup simple. Material names in Blender should be clear, unique, and consistent with the VMT files you plan to create. Renaming a material after export can break the connection between the mesh and its Source material.
If the model requires collision, build a separate low-detail mesh. A collision model should be much simpler than the visible object. Complex concave geometry can cause physics errors or produce an unnecessarily heavy model.
Step 3: Export the Model as SMD or DMX
The next stage is to create the Source Engine export files. SMD is simple, established, and suitable for many props, characters, and animation sequences. DMX can carry richer data and is often the better choice for more advanced SFM work, especially when a workflow involves flexes or features supported by the exporter.
For a basic model, export the reference mesh first. A rigged reference export should contain the visible geometry, skeleton, and weights. Then export each animation sequence separately. If you created a collision mesh, export it as its own file as well.
Use descriptive filenames and keep them in one organized source folder. For example, the reference mesh, idle animation, and collision model should have names that are easy to recognize when you build the QC file.
Before moving on, confirm that:
- The reference export contains the expected mesh.
- The skeleton and bone names are present.
- Animation exports use the intended frame range.
- The collision file contains only the simplified collision geometry.
- Material names match the names you will use for the VMT files.
If an exported file is empty, unusually small, or missing objects, return to Blender and check the export selection and Source Tools settings. Compiling repeatedly will not fix an incomplete export.
Step 4: Convert and Organize the Textures
Source Filmmaker uses VTF textures and VMT materials. The VTF stores the image data. The VMT tells the engine which shader to use and where the texture is located.
Convert the model’s color texture to VTF, then create a VMT with the same material name used by the exported mesh. For an ordinary lit model, VertexLitGeneric is a common shader choice. The material’s base-texture reference should point to the VTF path relative to the main materials folder, normally without including the file extension.
Three names must agree:
- The material name exported from Blender
- The VMT filename
- The texture path written inside the VMT
Place the VMT and VTF files in a dedicated project folder under SFM’s materials directory. A path such as materials/models/yourname/project keeps custom work separate from Valve content and other workshop assets.
Normal maps, transparency, self-illumination, and multiple skins can be added later. For the first test, focus on getting one color texture to display. If the model appears with a purple-and-black checkerboard, inspect the exported material name, the VMT filename, the base-texture reference, and the folder path.
Step 5: Set Up the Correct SFM Folder Structure
Keep editable source files separate from game-ready files. Your Blend file, SMD or DMX exports, QC file, and source images can live in a project folder outside the SFM installation. Compiled models and Source materials belong inside the selected SFM content folder.
For a typical usermod setup, organize the final files like this:
| Content | Typical location |
|---|---|
| Compiled model files | usermod/models/yourname/project |
| VMT and VTF files | usermod/materials/models/yourname/project |
| QC, SMD, and DMX source files | A separate working folder of your choice |
The SFM usermod folder is convenient for local testing, but a dedicated custom mod folder can make long-term content management cleaner. Whichever location you choose, it must be mounted and recognized by Source Filmmaker.
The output path named in the QC file is relative to the models directory. The material search path is relative to the materials directory. Confusing those two roots is one of the most common reasons a model compiles to the wrong location or cannot find its texture.
Step 6: Create the QC File
The SFM QC file is a set of build instructions for StudioMDL. It identifies the output model, reference mesh, material folder, surface type, sequences, and optional collision data.
You do not need a large QC file for a first prop. Start with the essential instructions and add optional features only after the model works.
| QC instruction | What it controls |
|---|---|
| $modelname | The output path and filename of the compiled model |
| $body or $model | The reference mesh used to build the visible model |
| $cdmaterials | The folder where Source should search for the model’s materials |
| $surfaceprop | The physical surface type, such as metal, wood, or flesh |
| $sequence | An idle or animated sequence included with the model |
| $staticprop | Marks an appropriate object as a static prop |
| $collisionmodel | Adds collision data for a prop |
| $collisionjoints | Adds jointed physics data for a ragdoll-style model |
| $bodygroup | Adds switchable mesh groups |
| $texturegroup | Adds selectable material skins |
Check every filename carefully. A QC reference must match the actual SMD or DMX filename, including its extension. Quotation marks should be paired, and paths should use the structure expected by the Source tools.
Even a basic model generally needs a valid sequence. A prop can use a simple idle sequence based on suitable exported data. A rigged character may use separate animation files for idle, walk, or other actions.
The material path in $cdmaterials should identify the model’s folder beneath the materials directory. The output named by $modelname should identify the destination beneath the models directory. They may look similar, but they serve different purposes.
Step 7: Configure Crowbar for Source Filmmaker
Open Crowbar’s game setup and select or create a configuration for Source Filmmaker. Confirm that it points to SFM’s gameinfo file and the StudioMDL executable included with Source Filmmaker.
Then open Crowbar’s Compile section and:
- Select the prepared QC file.
- Choose the Source Filmmaker game setup.
- Confirm the intended output or game folder.
- Keep the compile log visible.
- Start the compile.
Using the wrong game configuration can produce errors even when the model files are correct. Different Source games may use different model versions or compiler behavior, so make sure you are using the SFM StudioMDL compiler.
Advanced users can run StudioMDL directly, but compiling an SFM model with Crowbar is easier to follow because the interface exposes the important paths and keeps the compiler output in one place.
Step 8: Read the Compile Log and Check the Output
Do not close the log as soon as Crowbar finishes. Read it from the first reported error downward. The final line may only say that processing stopped, while the real cause appears several lines earlier.
An error normally prevents StudioMDL from producing a usable model. A warning may allow the compile to finish, but it can still point to a real issue, such as discarded weights, missing data, or a limit that has been reached. Treat warnings as information to investigate rather than automatic proof that the model is broken.
After a successful compile, open the output folder and look for the MDL, VVD, and VTX files. Depending on the QC setup, you may also see PHY or ANI data. Keep the entire compiled model file set together.
A Crowbar task reaching the end does not always mean the model compiled successfully. The reliable signs are a log without unresolved fatal errors and a complete set of output files in the expected folder.
Step 9: Test the Compiled Model in HLMV
Load the model in Half-Life Model Viewer using the Source Filmmaker game configuration. HLMV is faster than building an SFM scene every time you change a material path or export setting.
Check the model from several angles and inspect:
- Overall scale and facing direction
- Shading, normals, and visible seams
- Materials and textures
- Bone positions and deformation
- Animation sequences
- Skins and bodygroups
- Facial flexes, if included
- Collision or physics data, when applicable
If the texture is missing, the Materials view can help show which material path the engine is trying to find. If the skeleton is distorted, compare the compiled result with the rest pose in Blender. Fix the problem at its source, export again, and recompile.
This test-and-recompile cycle is normal. Even experienced model creators rarely get every scale, material, rig, and QC detail right on the first attempt.
Step 10: Load the Model into Source Filmmaker
Open SFM, create or load a session, and load a map. In the Animation Set Editor, choose Create Animation Set for New Model. Search for the compiled filename or browse to its model path, select it, and add it to the scene.
Once loaded, check that the model can be selected and moved. For a character, expand the animation set and test the available bones and controls. If the model includes bodygroups, skins, or sequences, verify those options as well.
If the custom model is not showing in SFM, check the following:
- The compiled files are inside a mounted models folder.
- The QC output path matches the folder where the files were created.
- The MDL still has its VVD and VTX companion files.
- The model browser search uses the compiled name rather than the Blender filename.
- SFM was refreshed or restarted after major folder changes.
Do not copy the model into random Valve content folders just to make it appear. Fixing the game configuration and folder structure gives you a cleaner setup and prevents later conflicts.
Common SFM Compile Errors and How to Fix Them
StudioMDL or GameInfo Path Cannot Be Found
Open the Crowbar game setup and recheck the Source Filmmaker paths. The configuration should use SFM’s own gameinfo file and compiler. If SFM was moved to another Steam library, an old path may still be saved.
Error Opening an SMD or DMX File
Compare the filename in the QC file with the exported file. Look for spelling differences, an incorrect extension, a changed folder name, or an export that was never created. Relative paths are resolved from the working location expected by the QC and compiler.
Model Has No Sequences
Add or correct a $sequence instruction and make sure it points to valid exported data. For a basic prop, a simple idle sequence is usually enough. For a character, verify the animation filename and frame range.
Model Compiles but Does Not Appear in SFM
Check $modelname, the Crowbar game setup, and the final models directory. Search for the actual output MDL on disk. If it was compiled into another game or content folder, SFM will not find it unless that location is mounted.
Missing or Checkerboard Textures
Trace the material path in order: exported Blender material name, VMT filename, $cdmaterials folder, base-texture reference, and VTF filename. One mismatch is enough to break the material.
Model Is Too Large, Too Small, or Facing the Wrong Way
Correct the scale and orientation in Blender, verify the export settings, and compile again. Avoid using SFM transforms as a permanent workaround for a badly prepared asset, especially if the model will be shared.
Bones Become Distorted After Compilation
Inspect the rest pose, armature transforms, parent hierarchy, vertex groups, and weight normalization. If the exported model looks correct but the compiled result does not, simplify the rig and check the compile log for bone or weight warnings.
Too Many Vertices, Bones, Materials, or Weights
Source has practical model limits. Reduce unnecessary geometry, merge materials where sensible, remove unused bones, and simplify excessive vertex influences. If the model is genuinely complex, divide it into sensible bodygroups or separate assets rather than forcing everything into one mesh.
Beginner’s Pre-Compile and Post-Compile Checklist
Before Compiling
- Clean the mesh and remove unused objects.
- Verify scale, origin, orientation, UVs, and normals.
- Check the armature, bone hierarchy, and weights.
- Confirm that the SMD or DMX exports contain the expected data.
- Match Blender material names with the VMT filenames.
- Place the VTF and VMT files in the intended materials folder.
- Check every QC filename and path.
- Select the Source Filmmaker setup in Crowbar.
After Compiling
- Read the entire Crowbar compile log.
- Resolve fatal errors and investigate meaningful warnings.
- Confirm that MDL, VVD, and VTX files were created.
- Keep PHY and ANI files if the compiler produced them.
- Test scale, textures, bones, and sequences in HLMV.
- Load the model through SFM’s Animation Set Editor.
- Save a backup of the working model, exports, textures, and successful QC file.
How to Create a Model for SFM?
Create or prepare the mesh in Blender, unwrap its UVs, make the textures, and add a skeleton if the model needs to pose or animate. Use Blender Source Tools to export the reference mesh and any animations as SMD or DMX files.
Next, convert the textures to VTF, create matching VMT materials, and write a QC file that describes the model. Compile the QC with SFM’s StudioMDL compiler, usually through Crowbar. Test the result in HLMV, then load it into Source Filmmaker.
Creating the mesh is only one part of the job. A usable Source Filmmaker custom model also needs correct materials, paths, compiler instructions, and game-ready output files.
Is SFM Harder Than Blender?
SFM and Blender are difficult in different ways. Blender has a broader toolset for modeling, sculpting, UV work, rigging, animation, simulation, and rendering, so its full learning curve is larger. SFM is more focused on posing, animation, lighting, cameras, and filmmaking with Source assets.
For model compilation, you often need both. Blender prepares the asset, while Source Filmmaker uses the compiled result. A beginner may find Blender’s interface harder at first, but SFM model porting can feel more technical because it depends on several file formats and exact folder paths.
What Does SFM Compile Mean?
SFM compile means converting Source-ready model data into the binary format that Source Filmmaker can load. StudioMDL reads a QC file and its referenced SMD, DMX, or other supported source files, then generates an MDL with the required supporting data.
Compilation is different from exporting. Exporting creates the source files from Blender. Compiling processes those files into the finished Source model.
How to Load a Model into SFM?
Place the complete compiled model set in a mounted SFM models folder and put its VMT and VTF files in the matching materials path. Open a session and map, go to the Animation Set Editor, and choose Create Animation Set for New Model.
Search for the compiled model name or browse to its folder, select it, and add it to the scene. If it does not appear, verify the output path, mounted content folder, companion files, and model-browser search term before compiling it again.
